Sim Handbrake assembly instructions
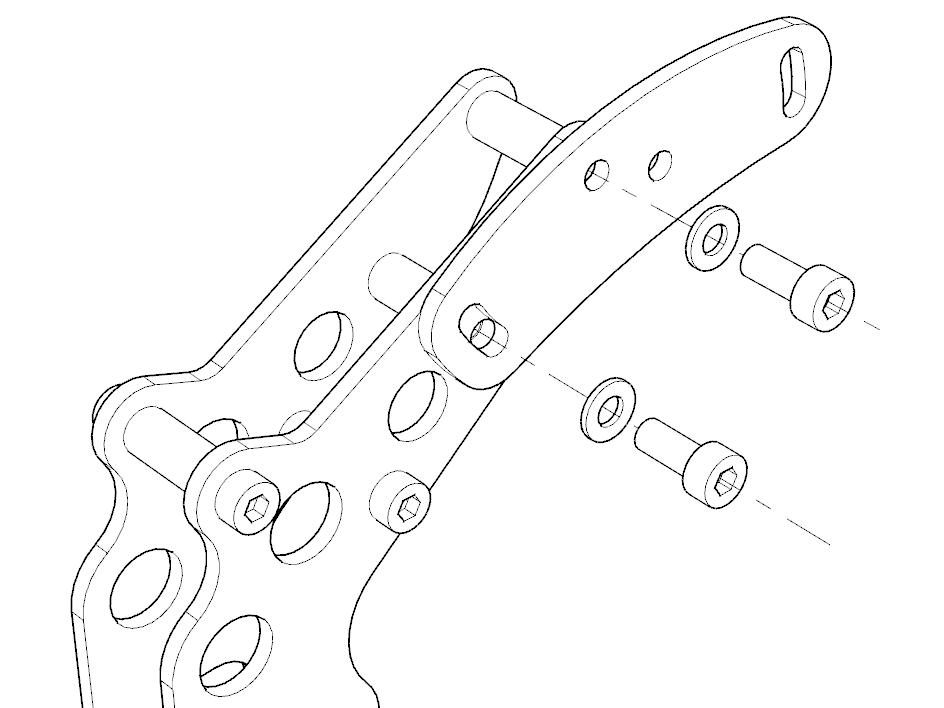
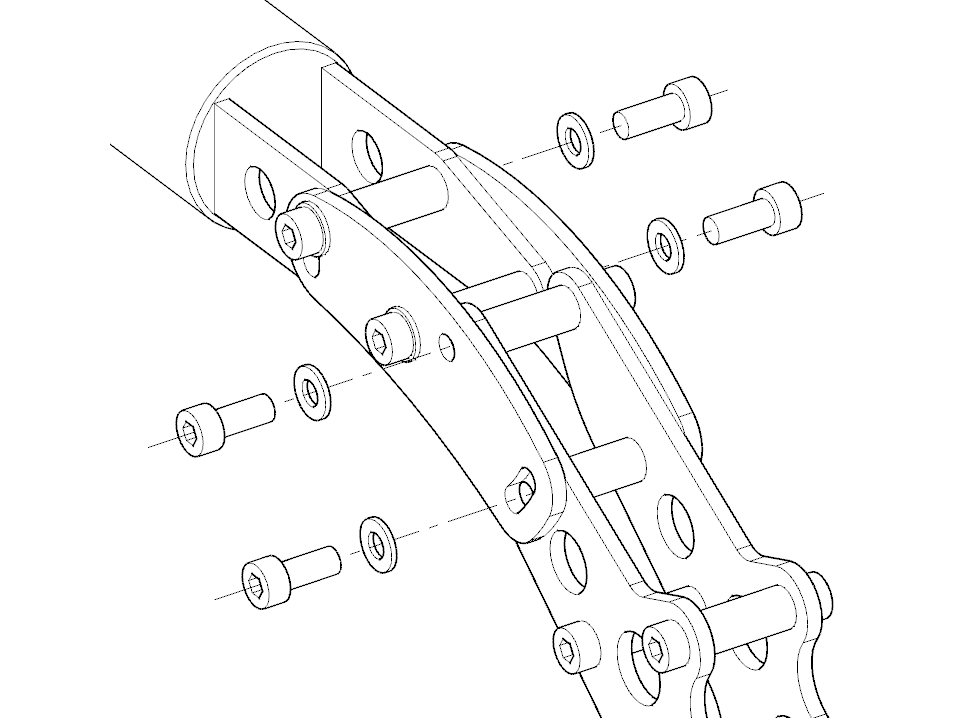
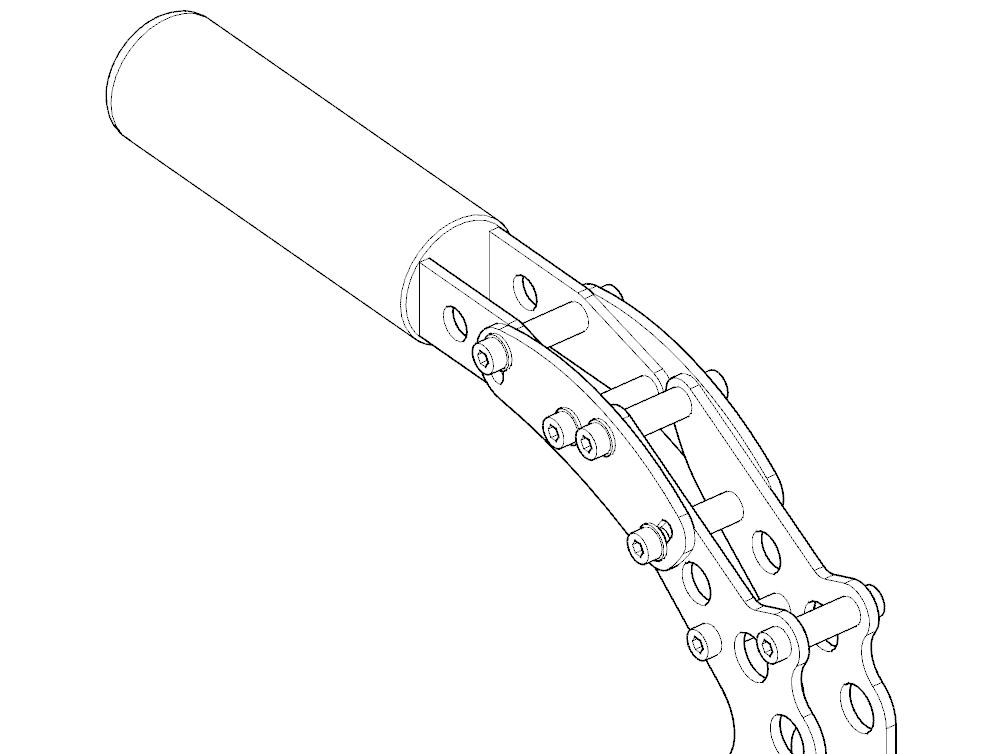
Your Sim Handbrake offers a lot of flexibility, with a handle that can be adjusted in 120 degrees in infinite steps. This paragraph contains instructions and images to mount the handle in the standard ‘flat’ position. The same mounting principle applies when installing the handle in any other angle to the base (also see next paragraph).
1) Mount one side bracket to the base of the handbrake. Use 2 treaded bushes, 2 bolts, 2 washers. Do the bolts just finger tight.
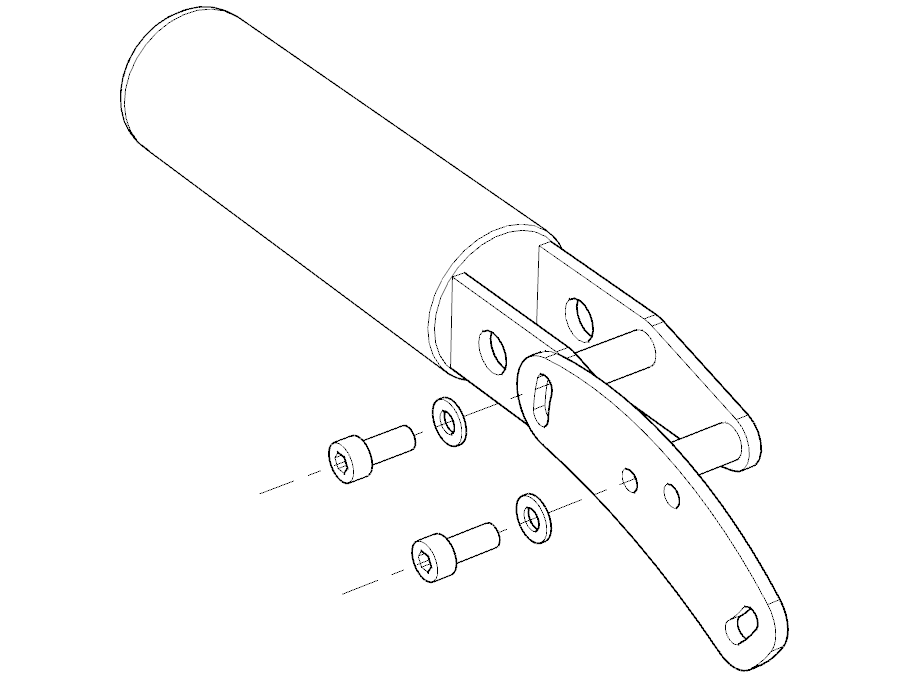
2) Mount the second bracket to the handle. Use 2 treaded bushes, 2 bolts, 2 washers. Do the bolts up just finger tight. Double check the orientation of the bracket.
3) Join the handle and the base part, insert the 4 remaining bolts with washers, finger tight.
4) Make sure the brackets are nice and symmetrical and tighten the bolts fairly tightly using the provided allen keys.
Adjusting the handbrake handle

Each installation may require a different optimal and ergonomic positioning and angle of the handbrake. Look at the schematic below to find the bracket and handle position to get the mounting angle that is right for you. The angle of the handle can be adjusted in 120 degrees infinite steps.
Adjustable handbrake force
By swapping the rubber in the handbrake you can adjust the maximum force of the handbrake. With the white rubber the maximum force is about 10kg (22lbs) The green rubber makes this about 17kg (37lbs). These values are indicative.
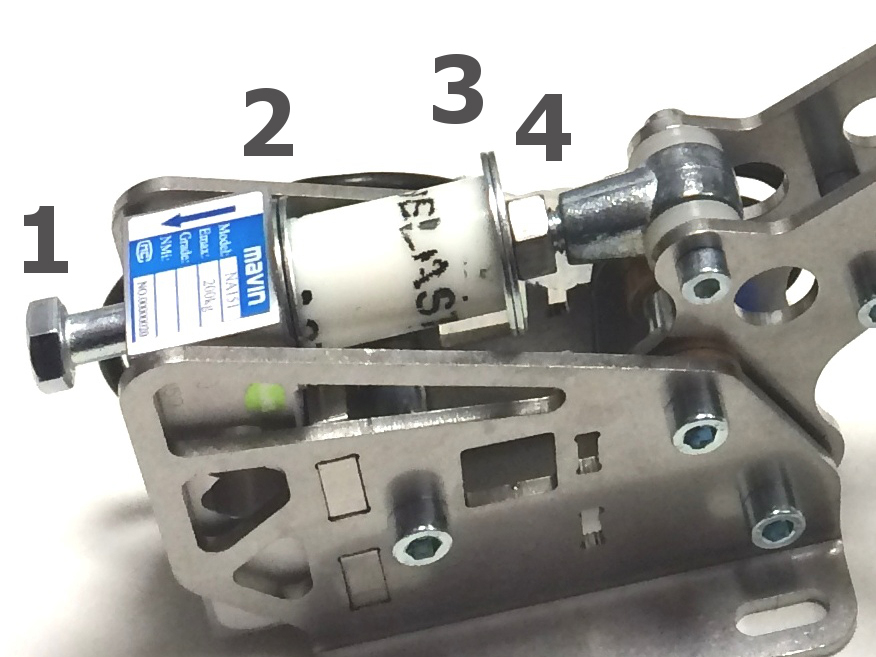
In order to swap the rubbers, identify parts 1 to 4 below (also see the image) and follow instructions A to D.
Parts list:
1) Bolt head (13mm hex)
2) metal washer(s)
3) metal washer(s)
4) preload nut (13mm hex
Rubber replacement instructions:
- a) Loosen preload nut (4)
b) Loosen bolt (1) and pull out
c) white = soft, green = hard rubber
d) put back in order
Don’t over tighten 1. After preload, the rubber length must be 30mm or more (1.18 inch) You can pull until you feel you hit an end stop, but you can also calibrate to a lower force level.
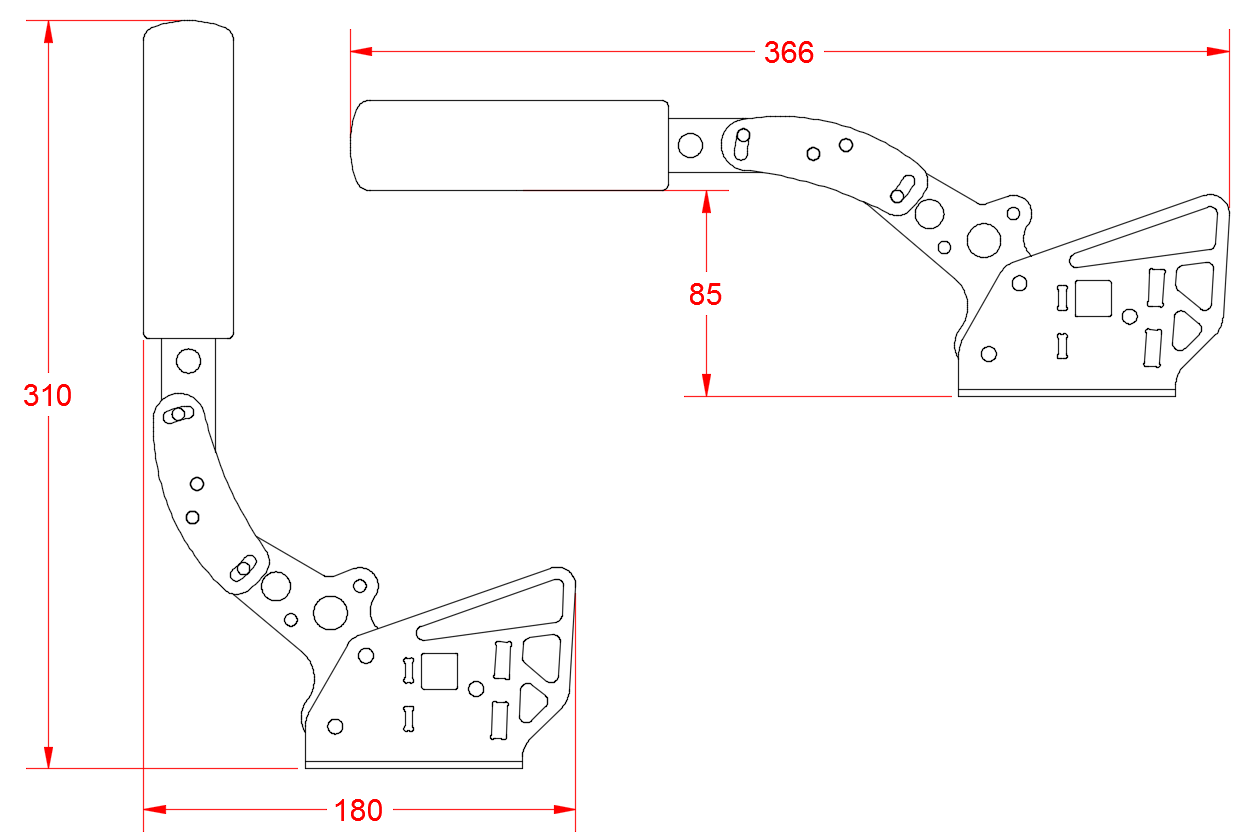
Mounting the handbrake
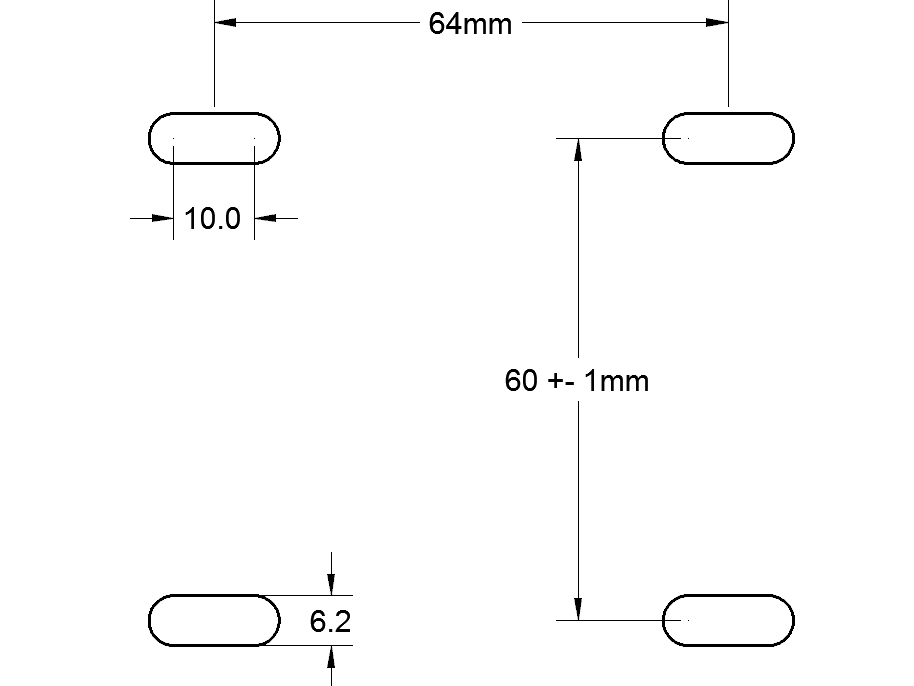
Mount the HE Sim Handbrake to a solid cockpit or frame. Mounting slots for M6 bolts are dimensioned as seen in the image below. This is a top down view, the brake handle is oriented from left to right. All dimensions are in millimeters.
Connecting the Sim Handbrake
You Sim Handbrake has been supplied with an external controller box. The RJ-plug which comes from the Sim Handbrake is inserted in one side of this controller. On the other side you insert the supplied USB cable, which in turn connects to your pc.
- For early spec versions of the Sim Handbrake, installation instructions for the controller can be found here.
Calibrating the handbrake
In order to calibrate the handbrake for Windows we recommend using DIView Calibration Software (ZIP). The handbrake acts just like a brake pedal, the video below shows a detailed instruction on how to calibrate a pedal within DIView. This calibration method will work for all software which uses the standard Windows calibration protocol.
Please note that some simulation software does not support an analogue handbrake yet. Please refer to the documentation of the simulator software to see what the possibilities of using an analogue handbrake are.