The Sim Pedals Racecenter are a pedal product suitable for use in commercial applications such as racecenters, expo simulators, rental simulators etc. These pedals are not intended for use in the consumer market.
Mounting the pedals
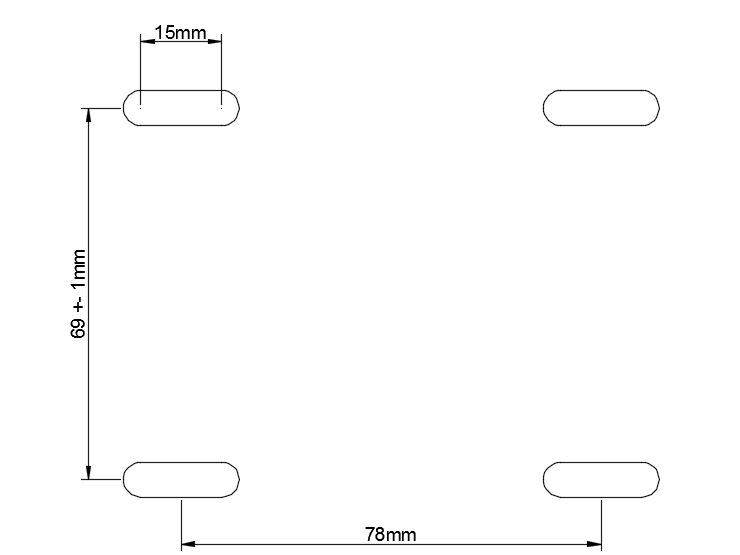
The base of each pedal has 4 mounting slots. The maximum bolt size for these slots is M6 (6 millimeter). The schematic for the mounting holes on the pedals can be seen below.
Keep in mind that the Sim Pedals Racecenter may be loaded with relatively high forces at the brake pedal, when applying these loads you must install the pedals on a very rigid base. The Racecenter pedals are not compatible with the Sim Pedals Baseplate (the Sim Pedals Baseplate only fits our Pro and Ultimate pedals).
Also note that the throttle and clutch pedal have the same contruction. They are completely interchangeable.
Installing the electronics
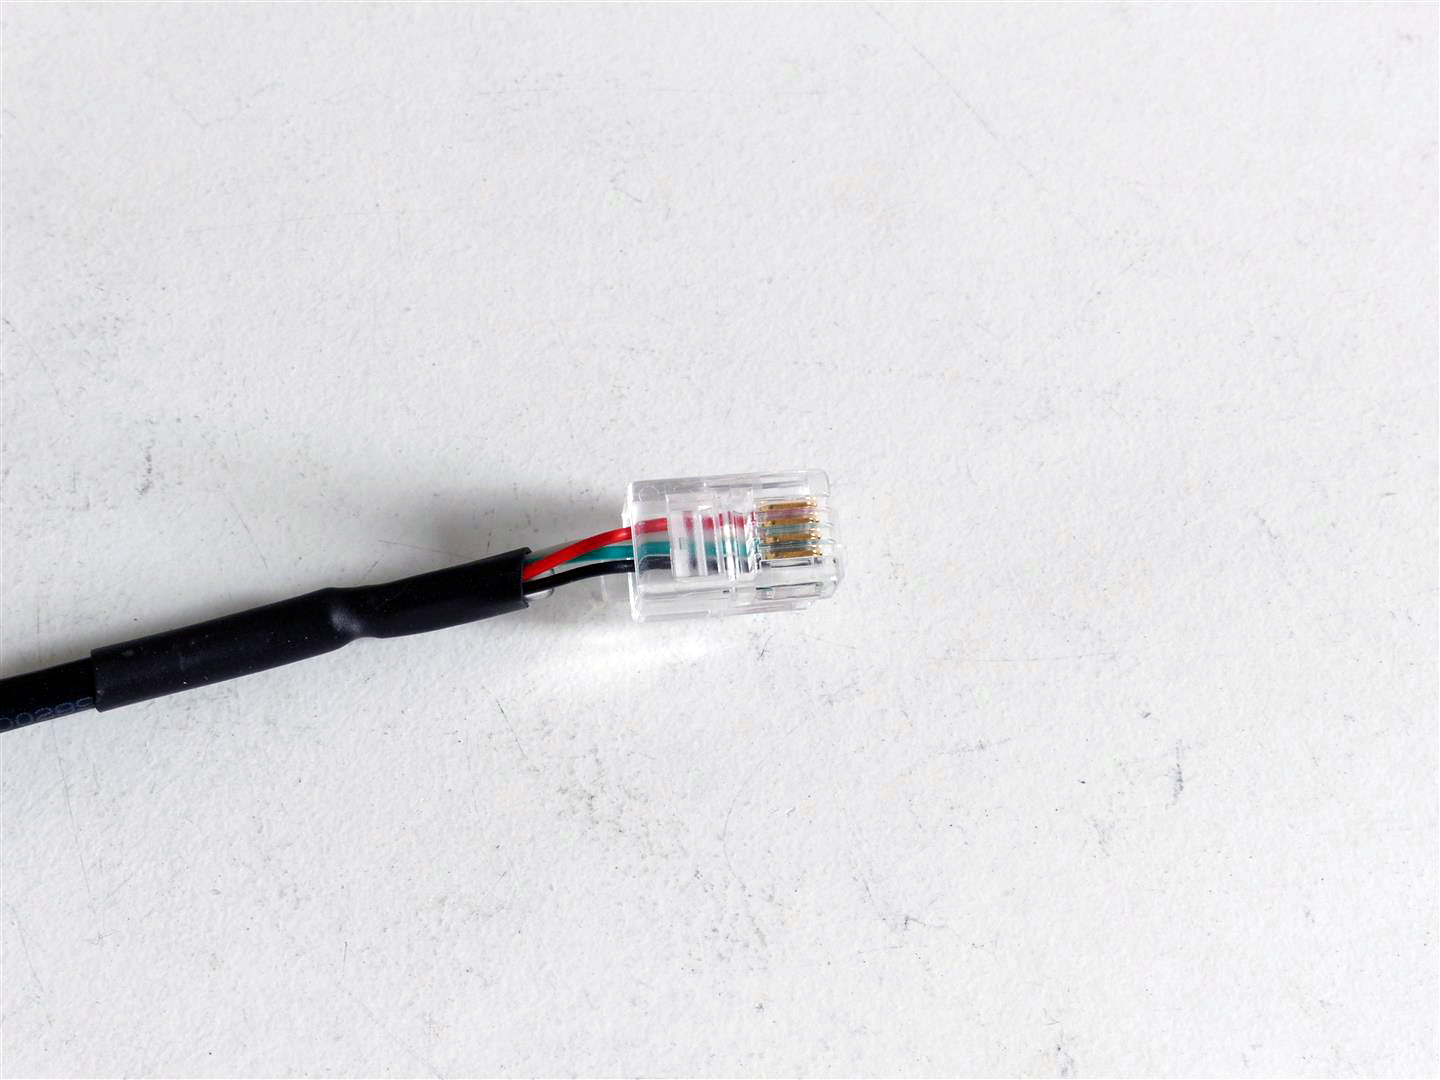
Each pedal needs to be connected to the USB-controller which is included with your pedal set. Every pedal has a wire with an RJ-plug at the end. Each RJ-plug needs to be inserted in the USB-controller. Any pedal can be inserted in any RJ-jack of the controller.
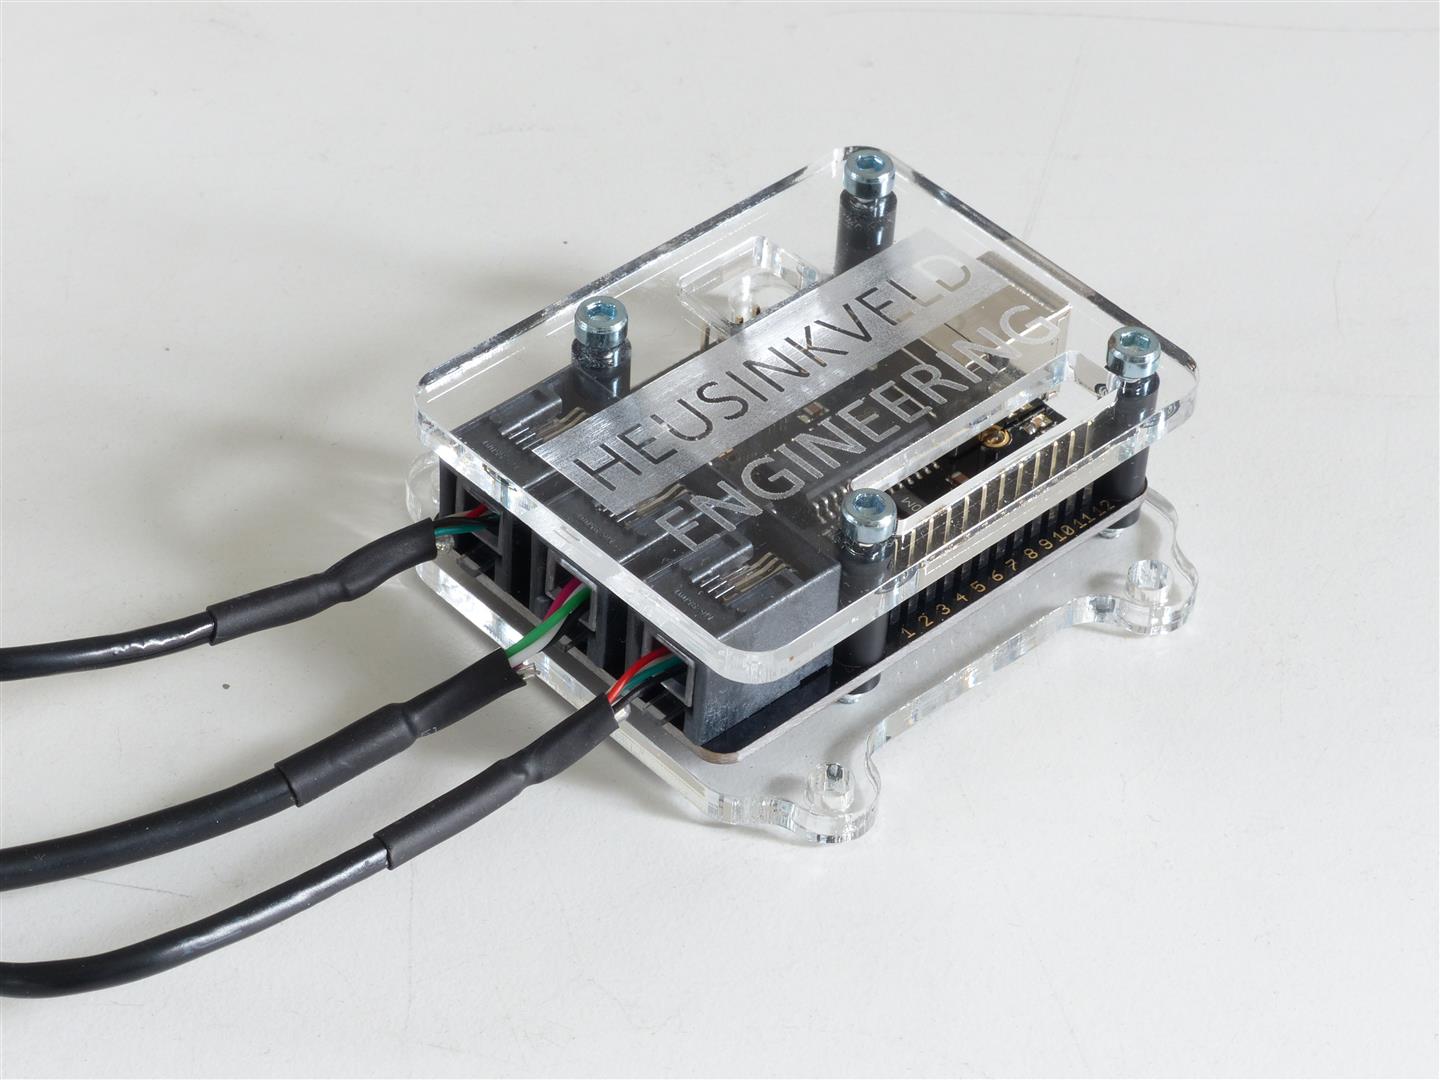
After connecting the pedals to the controller, you can hook up the controller using the included USB-cable. Windows will recognize an axis for each of the pedals, your Sim Pedals are now ready for calibration. The USB-controller also offers connectivity options for another 4 axis and 12 buttons in case you want to hook up additional buttons or rotary dials.
Your shipment also contains a small grounding wire. The grounding wire may be useful if you use a Direct Drive-based steering wheel (such as the AccuForce or OSW). In some circumstances these type of wheels cause interference to other electronics, which shows itself as a small jitter on the pedal output.
If this happens, you can connect the molex-connector side of the cable to one of the grounding pins of the controller. The other side can be connected to one of the bolts of the brake pedal. This should stabilize the signal.
In order to calibrate the pedals for Windows we recommend using DIView Calibration Software (ZIP). Please see the video below for a detailed instruction on how to calibrate the Sim Pedals using DIView. This calibration method will work for all software which uses the standard Windows calibration protocol, such as rFactor. Note that iRacing uses a proprietary calibration method.
The pedals use soft stops at the end of the pedal travel. When calibrating the throttle, make sure you don’t press the pedal arm ‘into’ this soft end stop when determining your maximum calibration value. This means that you need to press it ‘into’ the soft stop when racing as well in order to reach 100% pedal output.
The throttle should be calibrated to a value at which it is about to hit the end stop (so you create a very small deadzone at the end). This ensures your pedal output will be 100% right at the moment you hit the soft end stop.
Calibrating the pedals – a note on 2-pedal sets
If you are not using a clutch pedal, there will be one empty RJ-port on the USB-controller. You can calibrate this port in DiView to a value of MIN 4095, CENTER 4095 and MAX 4095 to eliminate any signal noise from this empty port.
Calibrating the Pedals – iRacing
iRacing is using a proprietary calibration method. Calibrating within DIView will have no effect on the functioning of your Sim Pedals in iRacing. When in iRacing, go to Options and then to Drive to access the calibration screen. The calibration wizard will start when you hit the Pedals button in the top right corner. Since your Sim Pedals are using a load cell, also make sure to set the Force Factor to zero (under Brakes in the top right corner).
The pedals use soft stops at the end of the pedal travel. When calibrating the throttle, make sure you don’t press the pedal arm ‘into’ this soft end stop when calibrating. This means you need to press it ‘into’ the soft stop when racing as well in order to reach 100% pedal output.
The throttle should be calibrated to the point where it is about to hit the end stop (so you create a very small deadzone at the end). This ensures your pedal out will be 100% right at the moment you hit the soft end stop.
Adjusting the pedals
The focus on the Sim Pedals Racecenter is on simplicity and durability. This means that compared to our other Sim Pedals products the adjustments are limited. It is for example not possible to adjust the pedal stiffness or pedal travel.
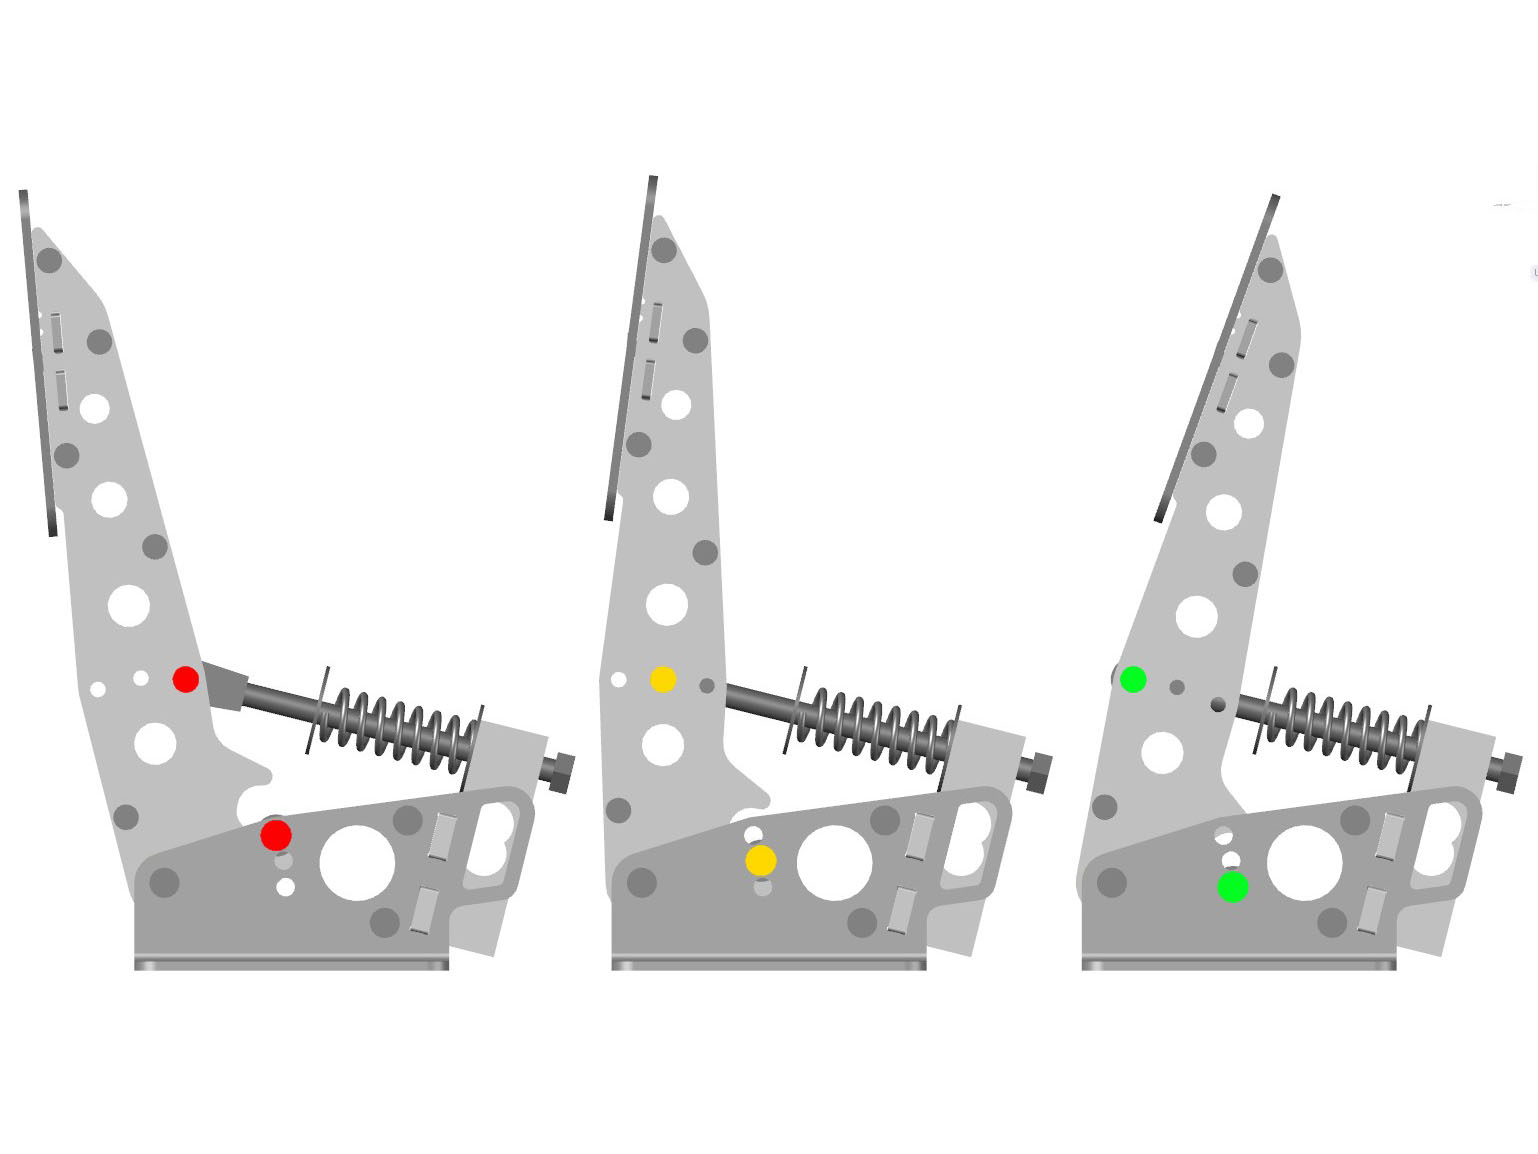
An important adjustment which you can make however is the angle of the pedal. This can be changed to either slanted forwards (typical in F1 style simulators), vertical or slanted backwards (typical for GT style simulators with a higher seat).
The angle of the pedals can be adjusted by changing the mounting point of the spring rod eg. spring axis. These can be connected to any of the 3 holes in the pedal arm. Be careful when you loosen the bolts of the spring rods on the pedal arm: There will be tension on the springs which may cause parts to ‘jump’ out of the assembly.
Please note that when you adjust the angle of the pedals, you also need to adjust the position of the soft blue endstop. The image shows the 3 possible pedal positions and the matching position of the soft blue end-stop.
Additional controller features
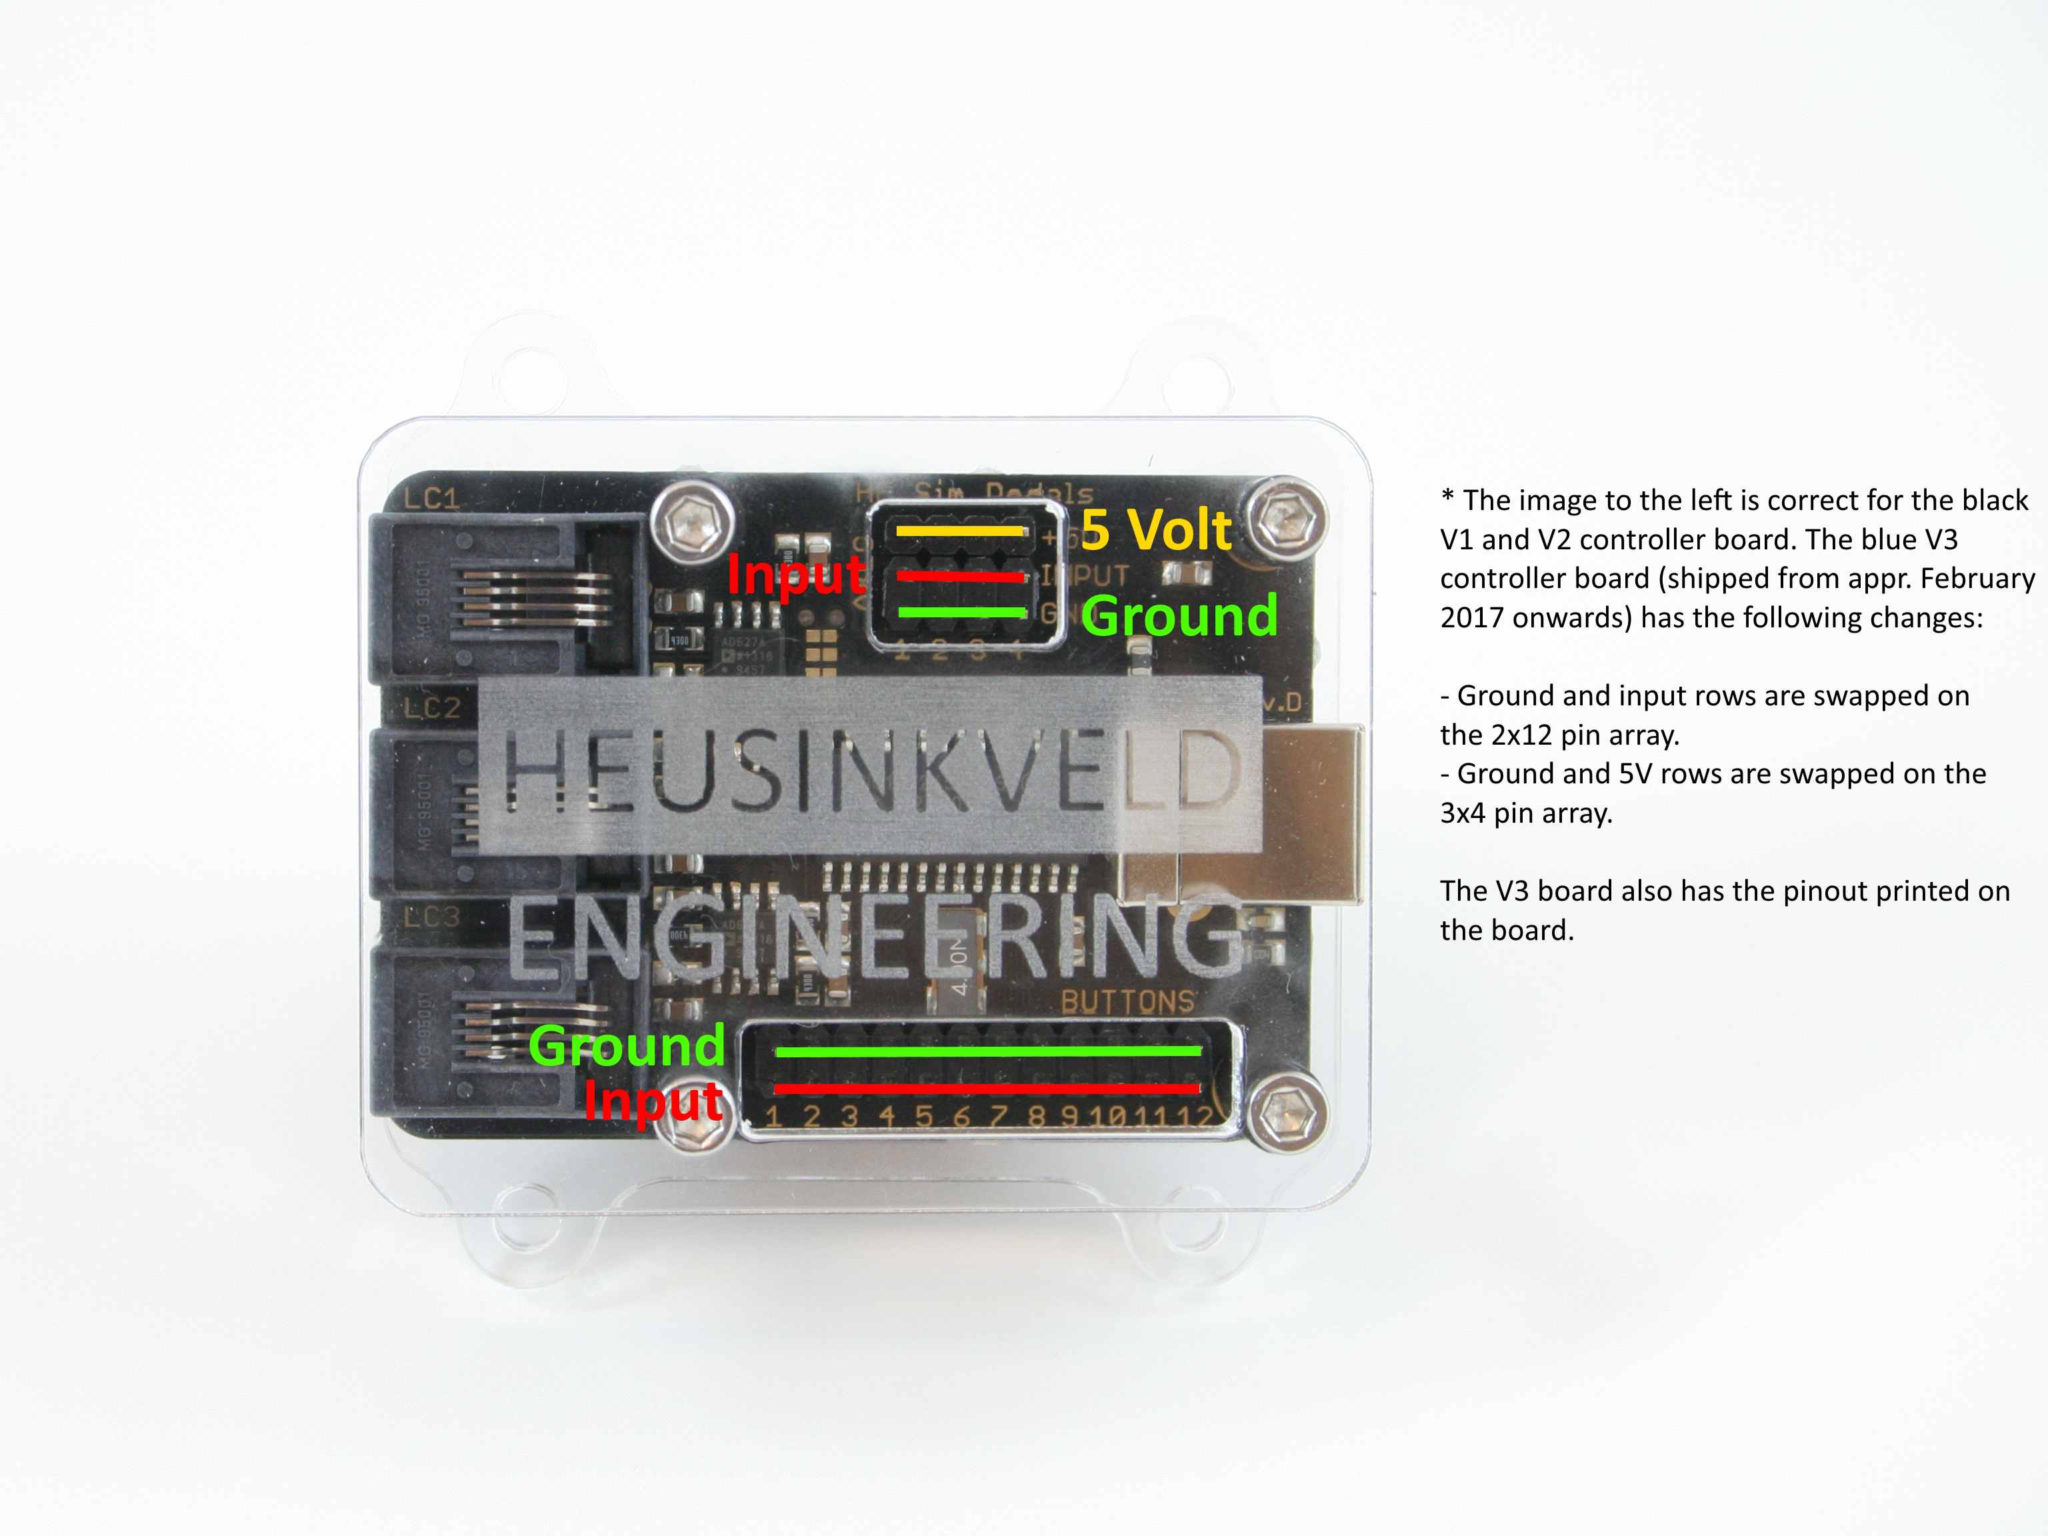
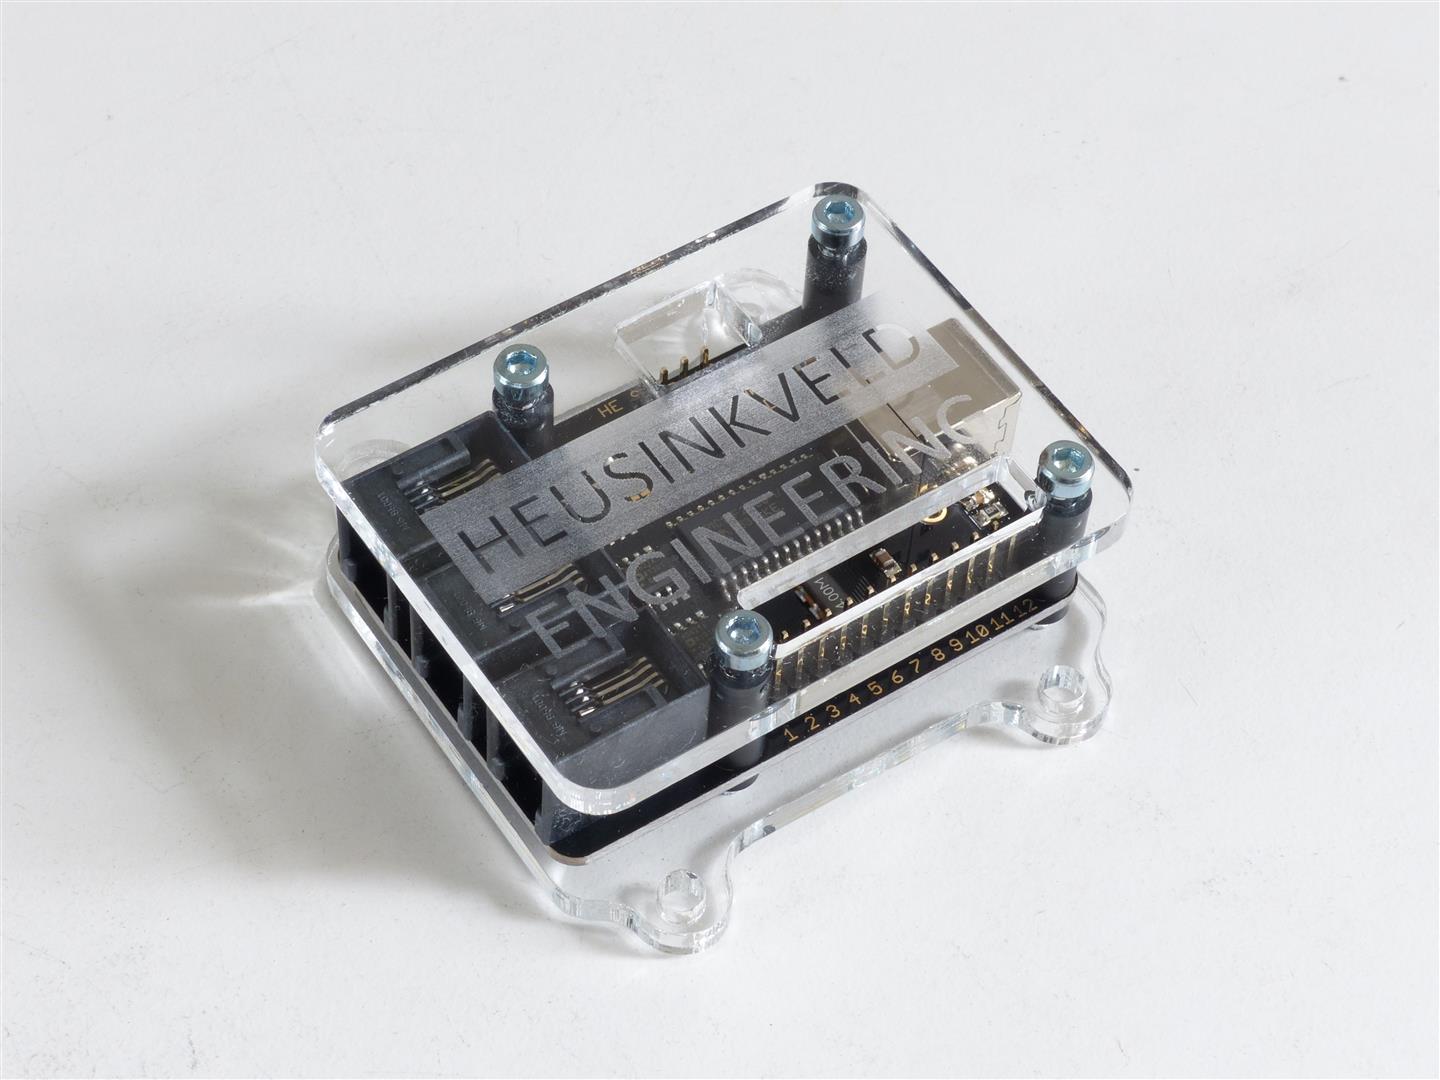
Every set of Sim Pedals comes with a USB-controller and a USB-cable. The controller has 3 RJ-sockets with a load cell amplifier to which the pedals are connected. Additionally, the controller features connectors for 12 buttons and 4 regular analogue axes. This means that you can connect additional hardware such as button boxes, shifters and rotaries to the board.
You can either solder wires directly to the board or use a more elegant solution by using regular 2.54mm spaced female headers. The pinout of the board can be seen in the image below.
Maintenance tips
Our Sim Pedals receive minor lubrication on just a few parts during the assembly process. Although there are a lot of metal parts making contact in our pedals, most of the time the resulting noise is minimal.
Over time, and as a result of various circumstances (such as temperature differences, humidity, force exterted on nuts & bolts when making adjustments, accumulating dirt & dust etcetera), small metal squeaks may occur on specific parts of the pedal assembly. If this happens, you can do the following to resolve this:
- 1. Check if all pivot points on the pedals move freely. If not, adjust nuts or bolts accordingly.
- 2. If the squeak noise seems to come from a spring: Rotate the spring around the axis (for example 90 or 180 degrees). Sometimes the spring needs to settle in a slightly different position to function with minimal noise.
- 3. If the squeak seems to come from a pivot point: You can use a non-syntetical lubricant (such as white grease) to lubricate the pivot points (bushing & axis). A simple alternative lubricant is a drop of olive oil.
The rubbers on the brake pedal are pre-lubricated. Over time, or after changing the rubbers a few times, the axis which holds the rubbers (eg. the inside of the brake rubbers) may need new lubrication to ensure smooth operation.
It is mandatory that you use a non-syntetical lubricant for this, as syntetical lubricants may affect the rubbers. We advise to use white grease or, as a simple alternative, a bit of olive oil.