This page contains instructions on installing and adjusting the Heusinkveld Engineering Sim Shifter Sequential. This is a compact, positive action gear shifter supplied with plenty of accessories to adjust the look and feel to your liking.
Mounting the shifter
There are several options to mount the shifter:
- 1. Using the M4 bolt holes at the bottom.
- 2. Using the supplied mounting plate. This can be attached to the two bolts on either side of the unit.
- 3. Using the table clamp.
Mounting the shifter using the M4 bolt holes at the bottom
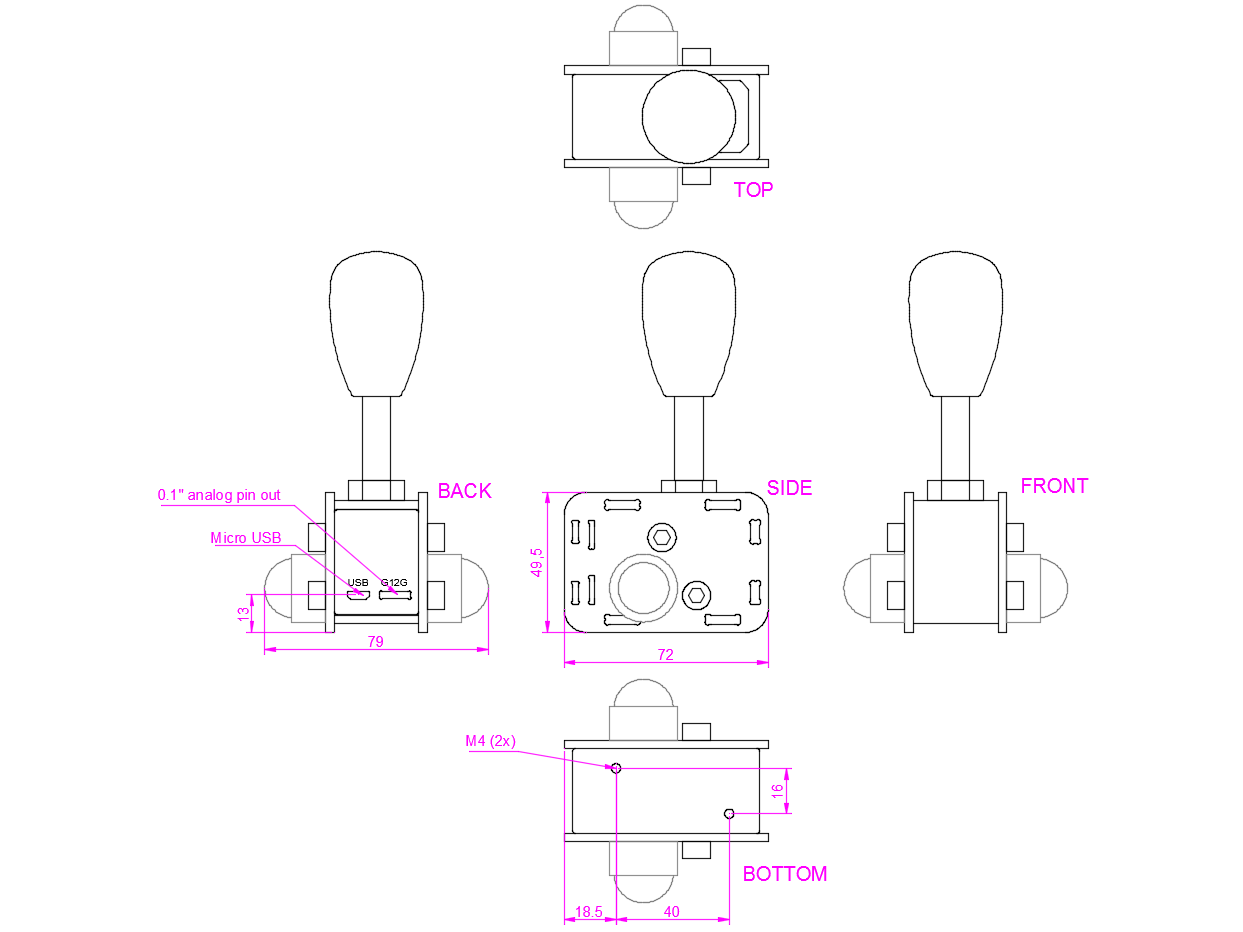
The shifter can be mounted to any flat surface using the 2 M4 bolt holes at the bottom of the unit.
Mounting the shifter using the mounting plate
- Important: Before proceeding to mount the shifter using the mounting plate, please note that the bolts on the side of the shifter unit are an integral part of the shifter internals. The maximum of bolts you can loosen on the shifter unit is 2, at one side at a time. Do not loosen bolts on both sides at the same time.
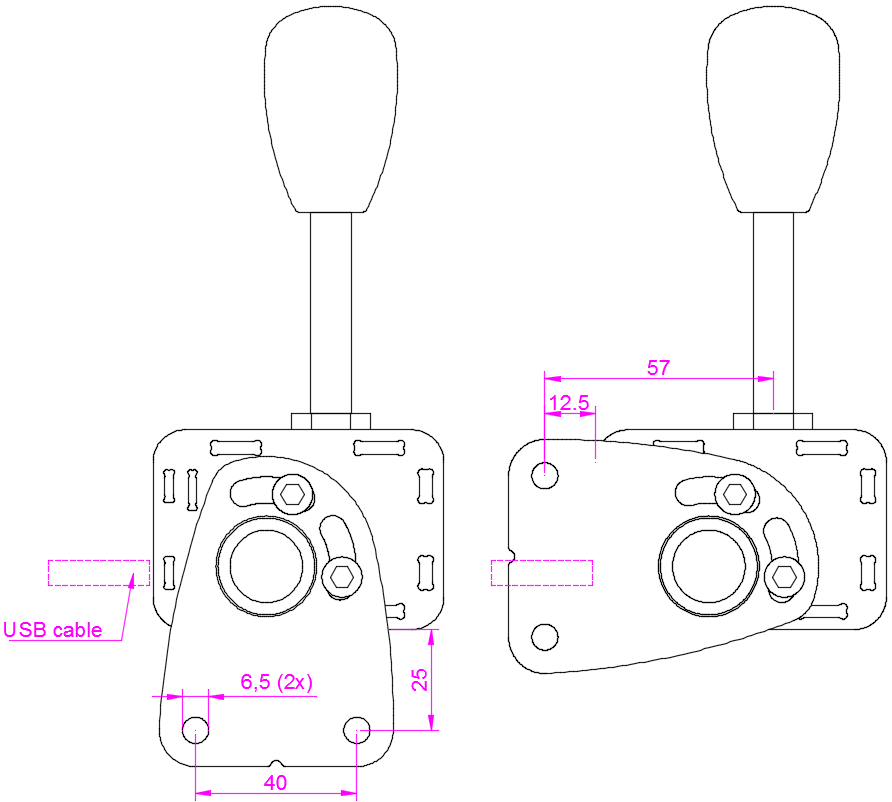
The supplied mounting plate can be mounted to the side of the shifter. By flipping the mounting plate, you can either mount it to a structure (such as an aluminium profile) below or in front of the shifter.
The image shows the possible mounting solutions with the mounting plate.
Mounting the shifter using the table clamp
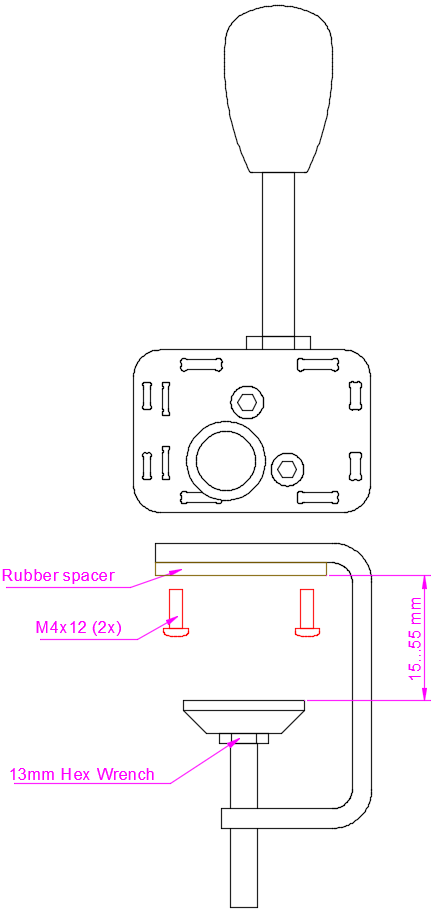
A table clamp is supplied with every shifter. This allows you to connect the shifter to a flat surface below the shifter unit.
The clamp can be connected to the shifter using the two supplied M4 bolts. The shifter can then be tightened to the surface using a 13mm hex wrench. A rubber protective pad is supplied which should be installed between the clamp and the table (eg. the mounting surface), in order to prevent any damage.
For further reference, please see the image.
Installing a lever and knob
Your shifter comes with different lengths and shapes of levers and three different knobs.
To install a lever, make sure to put the supplied M10 lock nut on the lever first. Attach the nut to the side of the longest thread on the lever, about as far as you can go. After installing the nut, insert the lever into the threaded socket at the top of the base unit and screw it into it’s base in clockwise direction. When the locking nut is a few milimeters away from the base unit, tighten the locking nut against the base.
The knob must be installed at the side of the lever with the shortest thread. Simply screw it on in clockwise direction until you achieve a solid fit. When removing a knob with the lever attached to the base unit, make sure that the lever is attached rigidly otherwise it might be difficult to remove it.
If you want to install a 3rd party knob: The lever size is M10 with a 1,5mm thread pitch.
Connecting the Shifter
You have two options to connect the shifter to your pc.
- 1. Using the USB-socket with the supplied USB-cable. The shifter will be recognized automatically by Windows. Manual installation of specific drivers is not needed.
- 2. Using the 4×1 2,54mm female Molex socket. This allows to you interface/integrate the shifter with an external controller, such as Sim Pedals USB controller (or any other third party controllers which offers an interface for switches. The pinout of the Molex socket is listed both on the shifter PCB as well as on the transparent PCB-cover. You will need to build your own cable if you want to use this method.
Configuring the Shifter
After connecting the shifter to your computer, you can assign up- and downshift functions in your favourite simulator software to the Sim Shifter Sequential. If you move the shifter, the output will be recognized as a button (one for upshifting, one for downshifting). On real racing cars, upshifting typically requires the lever to be pulled towards you, while on downshifting the lever is pushed towards your monitor.